
Assessments
Give grades and notes, document observations about your students, and keep track of the complete assessment history.
In the "Assessments" tab in the course you see at a glance all grades, observations and feedback about your students, and can enter new ones directly here.
🇮🇹 Are you from South Tyrol? The "Assessments" feature is not enabled for teachers in South Tyrol. Would you like to have the feature? Write to us: [email protected].
🇱🇺 Are you from Luxembourg? The "Assessments" feature is not enabled for teachers in Luxembourg.
The table overview
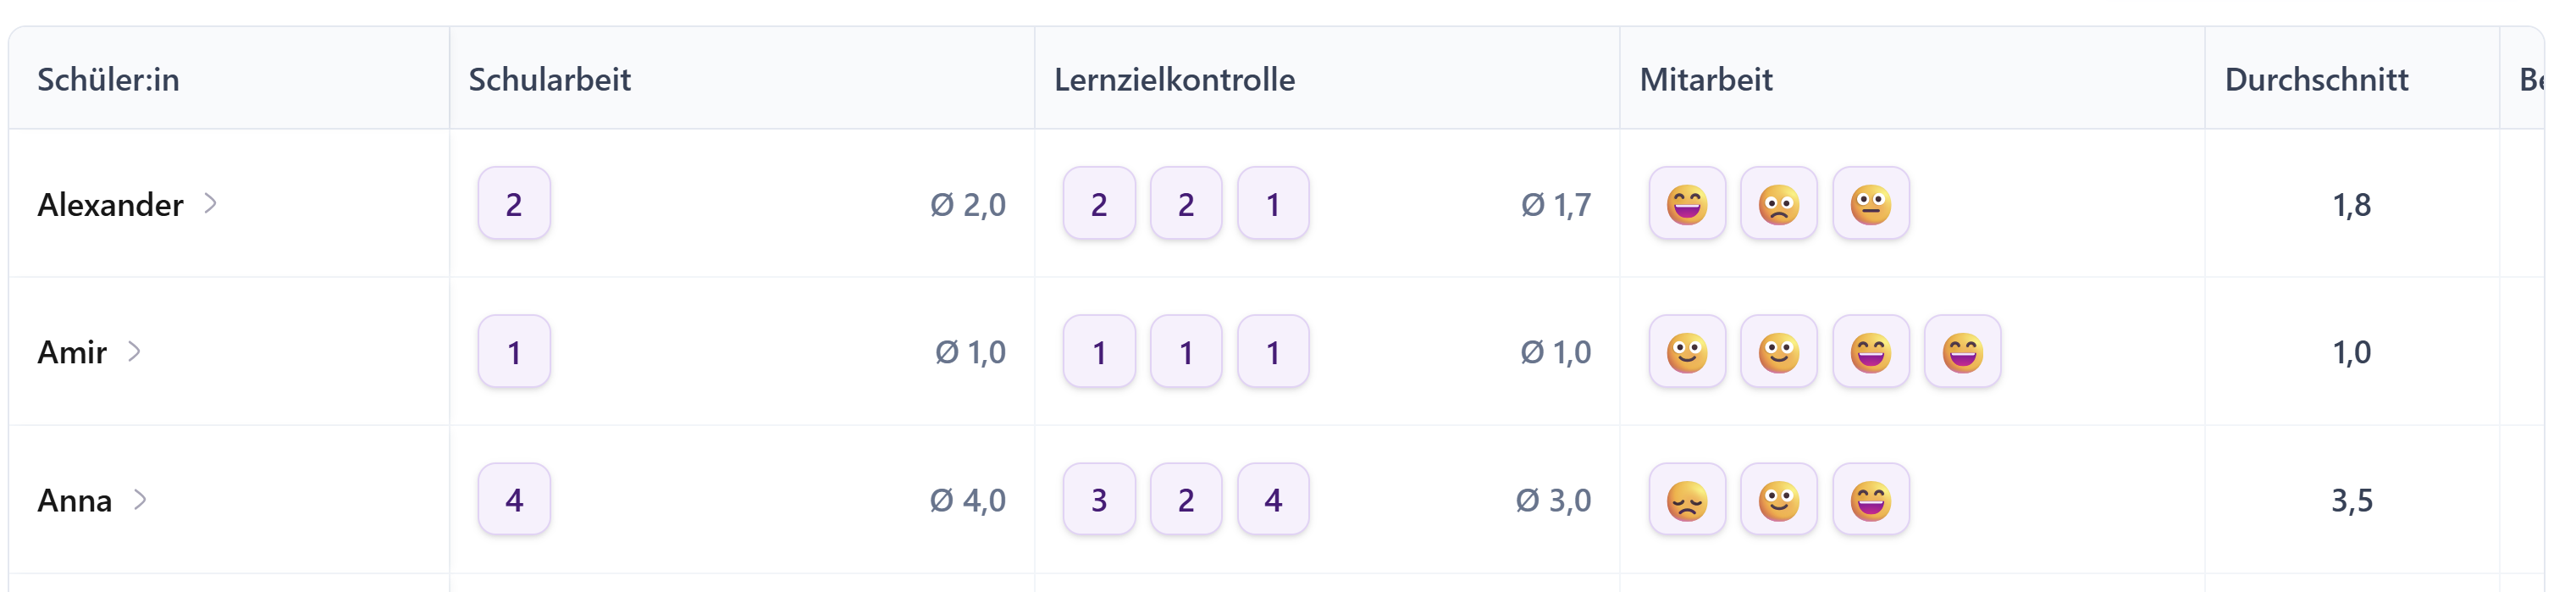
In the rows you see your students, in the columns the assessment categories. Teachino already suggests a few categories for this. But you don't have to keep these suggestions: you can create your own assessment categories, rename or delete them. Here's how:
How to configure this view
Click the gear icon, next to "Record documentation" at the top right of the "Assessments" tab.
Adjust assessment categories, delete an existing category via the three dots, or click "+ Add" to create a new one.
Name the new category, give it a title, for example "Class test", "Test", or "Exam"
Choose the grading display, either the country specific grading system (preset based on the country you provided at registration) or a general type such as emojis, thumbs up/down or percentages.
Currently you can only choose from the provided displays, your own grading systems or emojis are not yet possible.
Save, the category is added.
You change the order of the categories via drag and drop or via the three dot menu.
It works the same way with tags: you can use existing ones, rename or delete them, or create your own with title and color via "+ Add", as many as you like.
Weighting assessments: have the average calculated
The average is automatically activated for you as soon as you work with assessments. You can set it up so that it matches your grading practice exactly, with individual weighting of your assessment categories and the time period you want to take into account.
How to set up the average
Open configure overview, click the gear icon "Configure overview".
Go to the average section, there you'll find the "Average" section.
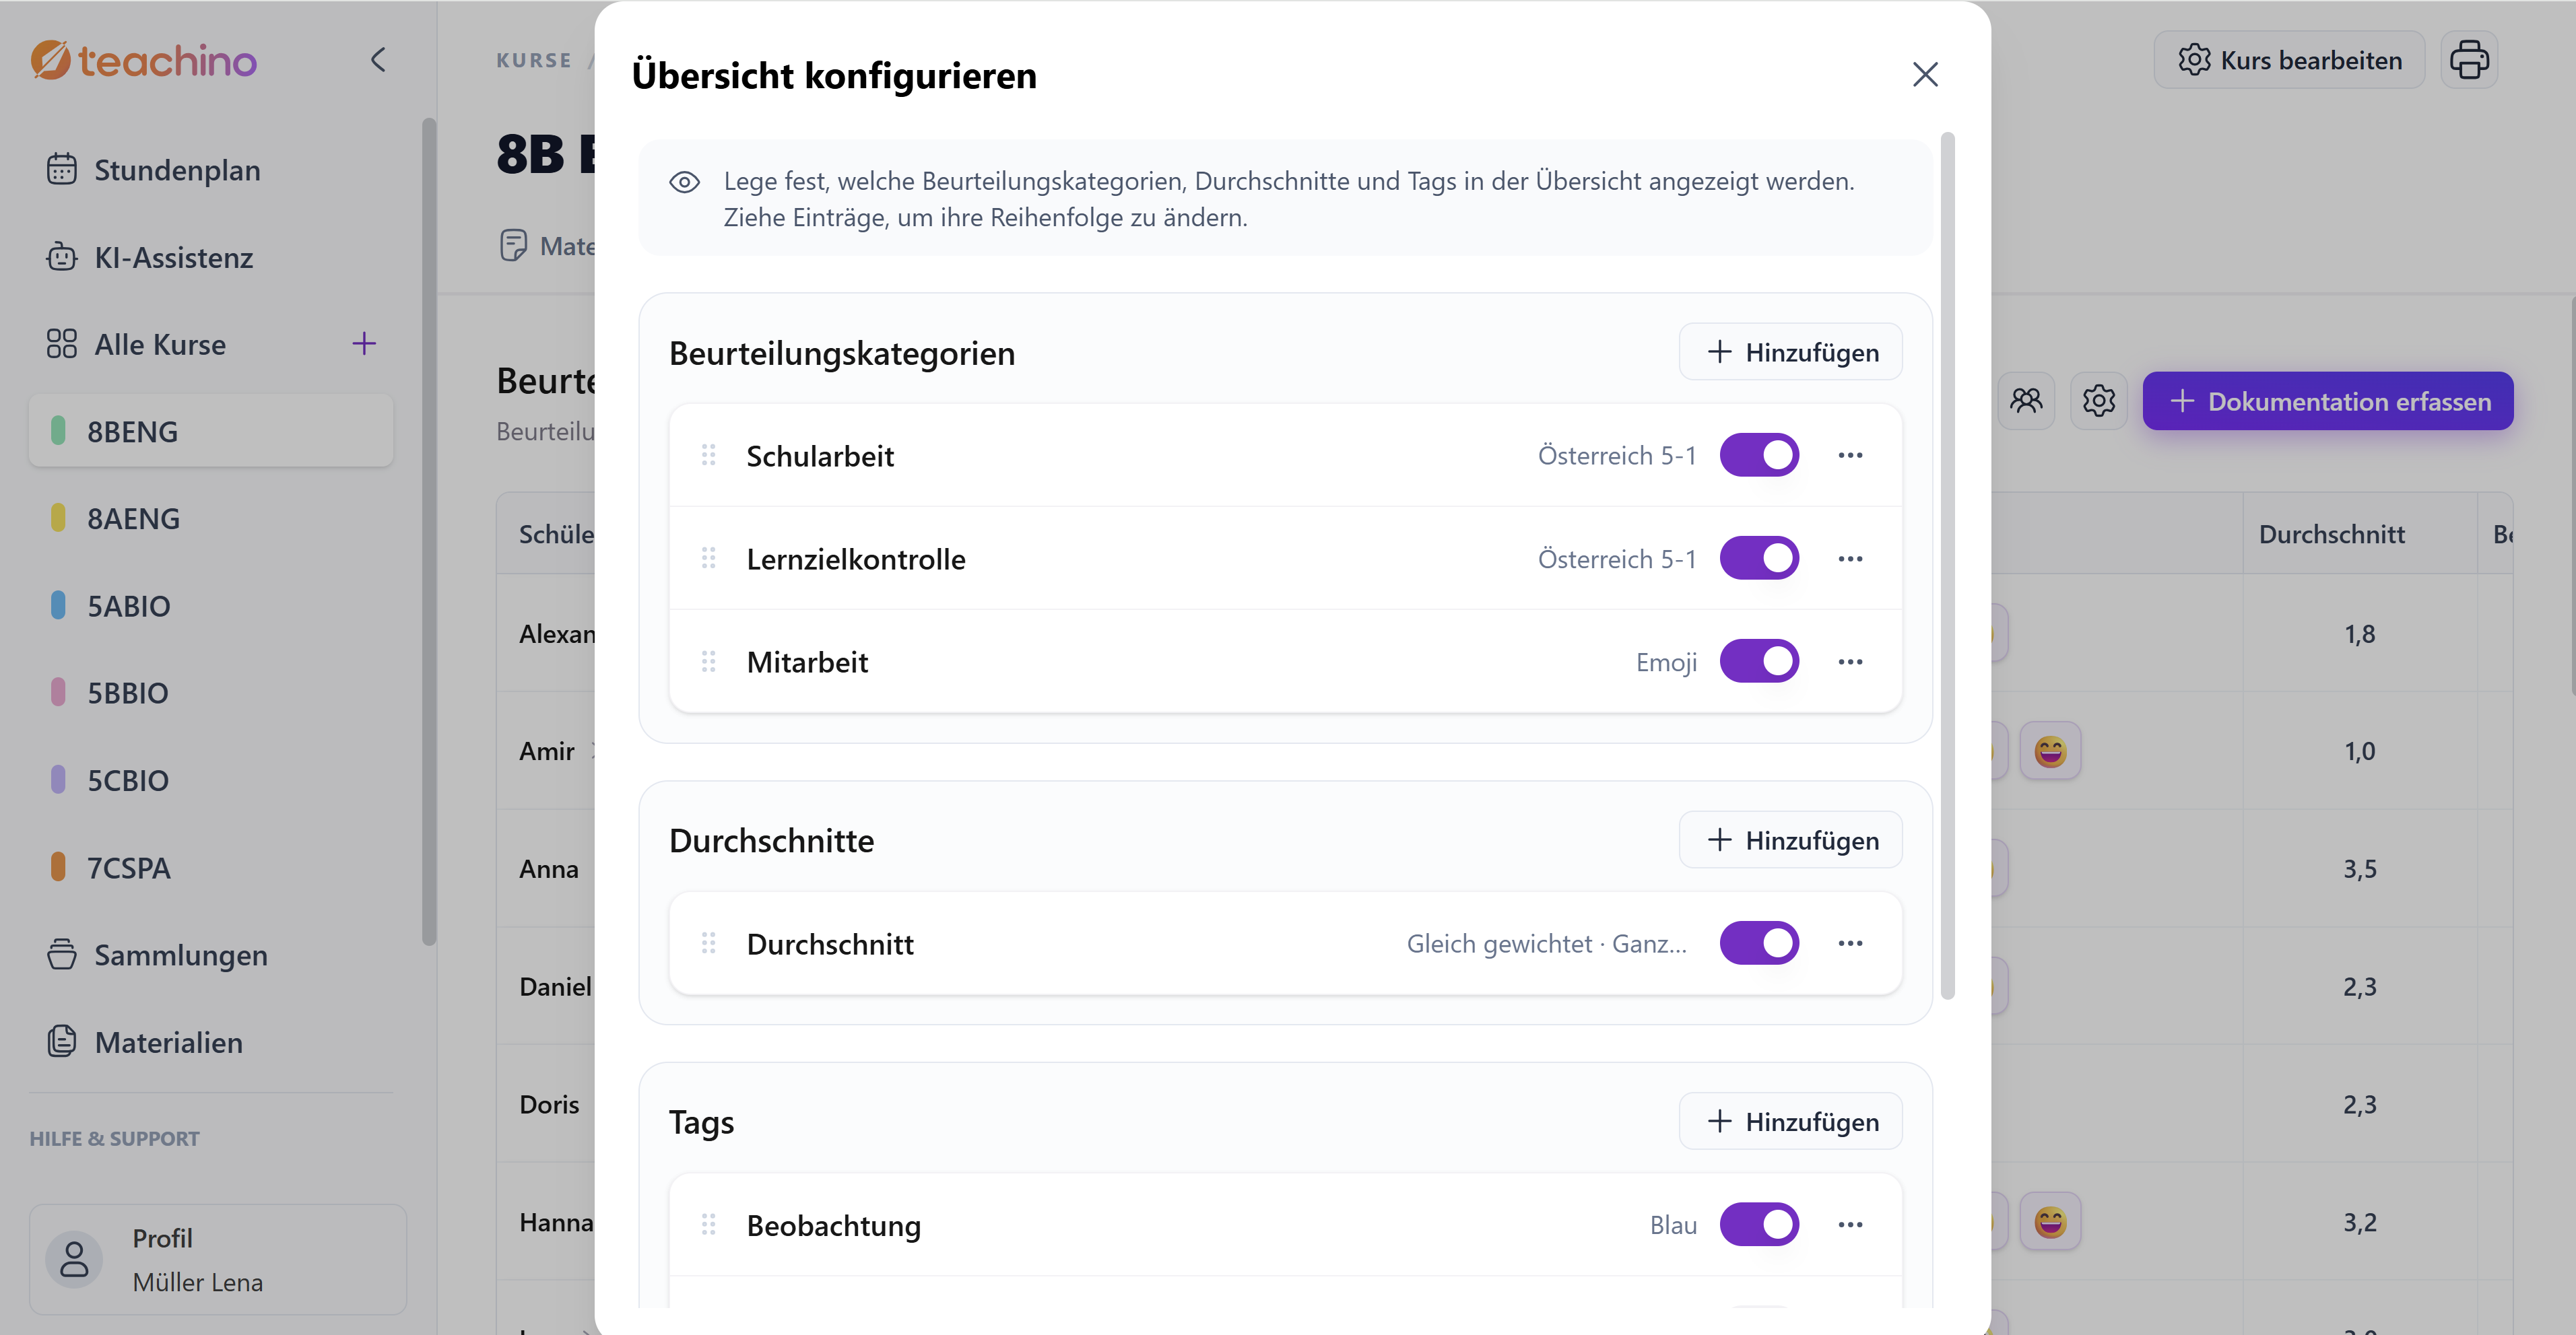
Add or edit average, use the "+ Add" button to create a new average. You edit an existing average via the three dot menu next to it.
Edit average: set weighting, distribute the weighting across your created assessment categories, for example class test with 50% and oral participation with 50%.
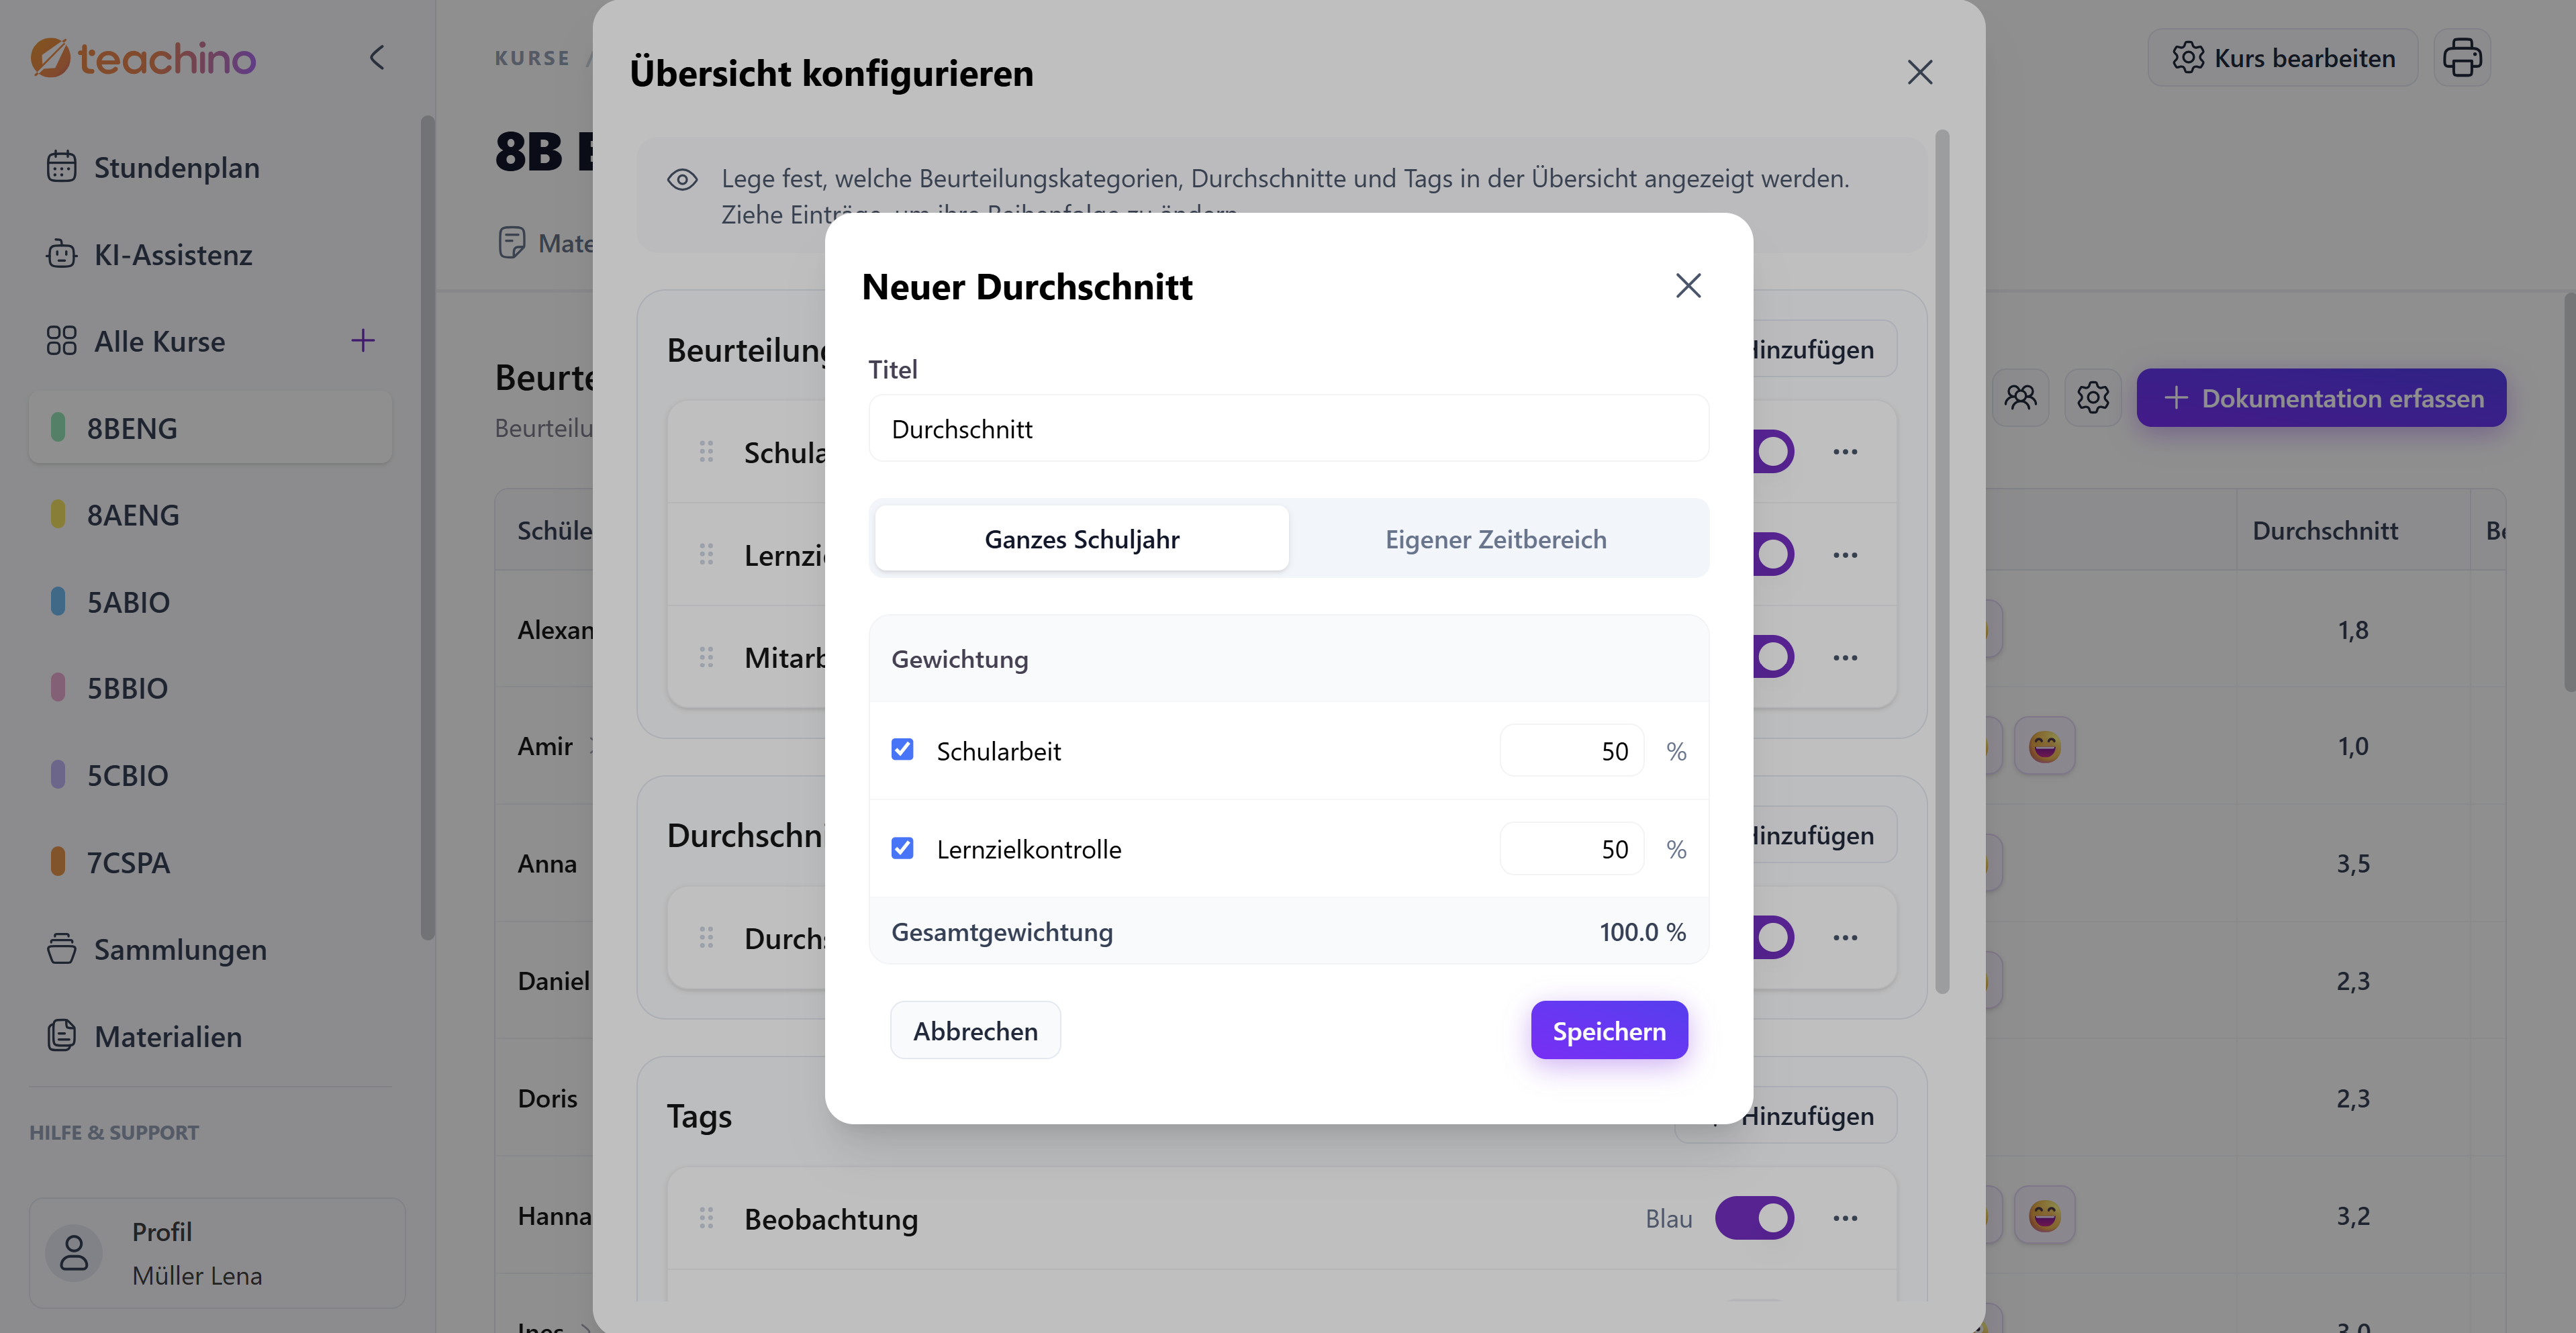
Choose time period, set the period for which the average should be calculated, or choose the whole school year.
Save, your average is now set up.
In your table you then see the average per assessment category as well as an overall average, which includes your weighting.
💡 Tip: you can create several averages at the same time, for example one for the whole school year and one for a single semester.
👉 You should set up this configuration once at the start of the school year to fit you and your work.
Recording documentation
You have two ways to enter assessments and notes: for your whole class at once via the "Record documentation" button, or individually directly in the overview table.
Add assessment
Here's how to enter, for example, the grade for a class test for your whole class:
Click Record documentation, you'll find the button at the top right of the "Assessments" tab. Then click "Add assessment".
Give it a title, give the assessment a name so you recognize it later, for example "Class test 1".
Choose entry date, enter the date the class test took place, or the date you're entering the assessment.
Select assessment category, choose the matching category, in this example "Class test".
Assign grade, now you see the list of your students that you created earlier. Click the matching grade or emoji for each student.
Optional: add note, as soon as you've assigned a grade, the option to add a note appears next to it. You can either type it or dictate it via the microphone icon.
Repeat steps 5 and 6 for all students you want to assess.
Save: add entries, click the button at the very bottom once you're done.
Your assessments then appear in the overview table in the matching column.
Add note or tag
You can also record individual observations about your students in the same way, for example about behavior or attendance:
Click Record documentation, and then "Add note".
Choose entry date.
Assign tags, click the relevant tags for the respective student, for example "Forgot homework" or "Positive contribution". A student can also get several tags at once, for example if they forgot the homework but still contributed positively to the lesson.
Optional: add note, write yourself a short note about it, for example "Forgot homework, but positive contribution in class".
You do this for all students, or only for those you want to enter something for right now.
Save: add entries, click the button at the very bottom once you're done.
💡 Tip: you can also use the tags to document attendance, just assign the tag "Absent" to missing students.
You don't always have to go via "Record documentation" for this: you can also click "+" directly in the overview table next to the matching student, to assign and save a grade or a tag along with a note individually there.
Observation history for each student
With the observation history you keep a complete overview of the whole school year for each student: grades, observations and feedback chronologically on a timeline in one place, always traceable by exact date.
Click the name or initials of a student in the assessments table. A window opens with:
the student's personal access code and QR code (which you can also copy or print from here)
a chronology of all assessments, tags and feedback so far, sorted by date
filters at the top (e.g. "Test", "Participation") with which you can show only a specific assessment category
Via the three dots next to an entry you can edit or delete it afterwards.
Tip: use this history as preparation for feedback conversations!
Frequently asked questions
Can I create my own assessment categories and tags?
Yes. Click the gear icon next to "Record documentation" and create new categories or tags via "+ Add", including your own name and, for tags, your own color.
Can I create my own grading systems or emojis?
Not currently. For an assessment category you can only choose from the provided displays: the country specific grading system or general types such as emojis, thumbs up/down or percentages.
Can a student get several tags at the same time?
Yes, for example if someone forgot the homework but still contributed positively to the lesson.
How do I see all assessments so far for a single student?
Click the name or initials of the student in the assessments table, in the observation history you then see all entries chronologically, which you can filter by assessment category.
Can I document attendance via assessments?
Yes, tags work well for this, for example just assign the tag "Absent" to missing students.
Was this helpful?